The author selected the Mozilla Foundation to receive a donation as part of the Write for DOnations program.
作者选择Mozilla基金会作为Write for DOnations计划的一部分接受捐赠。
介绍 (Introduction)
As demand for full-stack development continues to grow, web frameworks are making development workflows less cumbersome and more efficient; Django is one of those frameworks. Django has been used in major websites such as Mozilla, Pinterest, and Instagram. Unlike Flask, which is a neutral micro-framework, the Django PyPI package includes everything you would need for full-stack development; no need to set up a database or control panel for development.
随着对全栈开发的需求不断增长,Web框架使开发工作流不再那么繁琐,而效率更高。 Django是这些框架之一。 Django已在Mozilla , Pinterest和Instagram等主要网站中使用。 与Flask是中性的微框架不同,Django PyPI软件包包含了全栈开发所需的一切; 无需建立数据库或控制面板进行开发。
One common use-case for Django is to use it to display information from APIs (such as Instagram posts or GitHub repositories) in your own websites and web apps. While this is possible with other frameworks, Django’s “batteries included” philosphy means there will be less hassle and fewer packages required to create the same result.
Django的一种常见用例是在您自己的网站和Web应用程序中使用它来显示来自API(例如Instagram帖子或GitHub存储库)的信息。 尽管其他框架可以做到这一点,但Django的“含电池”理念意味着创建相同结果所需的麻烦更少,所需的软件包也更少。
In this tutorial you will build a Django project that will display your DigitalOcean account’s Droplet information using the DigitalOcean v2 API. Specifically, you will be creating a website that will display a table of Droplets listing each of their IP addresses, IDs, hosting regions, and resources. Your website will use BulmaCSS to style the page so you can focus on development while also having something nice to look at in the end.
在本教程中,您将构建一个Django项目,该项目将使用DigitalOcean v2 API显示您的DigitalOcean帐户的Droplet信息。 具体来说,您将创建一个网站,该网站将显示Droplet表,其中列出了它们的IP地址,ID,托管区域和资源。 您的网站将使用BulmaCSS来设置页面样式,以便您可以专注于开发,同时最终还可以看到一些不错的东西。
Once you complete this tutorial, you will have a Django project that can produce a webpage that looks like this:
完成本教程后,您将拥有一个Django项目,该项目可以产生一个如下所示的网页:
先决条件 (Prerequisites)
Before you begin this guide you’ll need the following:
在开始本指南之前,您需要满足以下条件:
A DigitalOcean account with at least one Droplet, and a personal access token. Make sure to record the token in a safe place; you’ll need it later on in this tutorial.
一个带有至少一个Droplet和一个个人访问令牌的 DigitalOcean帐户。 确保将令牌记录在安全的地方; 您将在本教程的后面部分中需要它。
Familiarity in making requests to APIs. For a comprehensive tutorial on working with APIs, take a look at How to Use Web APIs in Python3.
熟悉向API发出请求。 有关使用API的全面教程,请查看如何在Python3中使用Web API 。
A local virtual environment for Python for maintaining dependencies. In this tutorial we’ll use the name
do_django_apifor our project directory andenvfor our virtual environment.Python的本地虚拟环境,用于维护依赖关系。 在本教程中,我们将名称
do_django_api用于我们的项目目录,并将env用于我们的虚拟环境。- Familiarity with Django’s template logic for rendering pages with API data. 熟悉使用API数据呈现页面的Django模板逻辑。
Familiarity with Django’s view logic for handling data recieved from the API and giving it to a template for rendering.
熟悉Django的视图逻辑,用于处理从API接收到的数据并将其提供给模板进行渲染。
第1步-制作基本的Django项目 (Step 1 — Making a Basic Django Project)
From within the virtual environment env, install Django:
在虚拟环境env ,安装Django:
- pip install Django pip安装Django
Now you can start a Django project and run some initial setup commands.
现在,您可以启动Django项目并运行一些初始设置命令。
Use django-admin startproject <name> to create a subdirectory in the project folder named after your Django project, then switch to that directory.
使用django-admin startproject <name>在以Django项目命名的项目文件夹中创建一个子目录,然后切换到该目录。
- django-admin startproject do_django_project django-admin startproject do_django_project
- cd do_django_project cd do_django_project
Once it’s created, inside this subdirectory, you will find manage.py, which is the usual way to interact with Django and run your project. Use migrate to update Django’s development database:
创建之后,将在此子目录中找到manage.py ,这是与Django交互并运行项目的常用方法。 使用migrate更新Django的开发数据库:
- python3 manage.py migrate python3 manage.py迁移
You’ll see output that looks like this as the database updates:
随着数据库更新,您将看到如下所示的输出:
    Output
   Operations to perform:
  Apply all migrations: admin, auth, contenttypes, sessions
Running migrations:
  Applying contenttypes.0001_initial... OK
  Applying auth.0001_initial... OK
  Applying admin.0001_initial... OK
  Applying admin.0002_logentry_remove_auto_add... OK
  Applying admin.0003_logentry_add_action_flag_choices... OK
  Applying contenttypes.0002_remove_content_type_name... OK
  Applying auth.0002_alter_permission_name_max_length... OK
  Applying auth.0003_alter_user_email_max_length... OK
  Applying auth.0004_alter_user_username_opts... OK
  Applying auth.0005_alter_user_last_login_null... OK
  Applying auth.0006_require_contenttypes_0002... OK
  Applying auth.0007_alter_validators_add_error_messages... OK
  Applying auth.0008_alter_user_username_max_length... OK
  Applying auth.0009_alter_user_last_name_max_length... OK
  Applying auth.0010_alter_group_name_max_length... OK
  Applying auth.0011_update_proxy_permissions... OK
  Applying sessions.0001_initial... OK
Next, use the runserver command to run the project so you can test it out:
接下来,使用runserver命令运行项目,以便对其进行测试:
- python3 manage.py runserver python3 manage.py运行服务器
The output will look like this as the server starts:
服务器启动时,输出将如下所示:
    Output
   Watching for file changes with StatReloader
Performing system checks...

System check identified no issues (0 silenced).
September 22, 2019 - 22:57:07
Django version 2.2.5, using settings 'do_django_project.settings'
Starting development server at http://127.0.0.1:8000/
Quit the server with CONTROL-C.
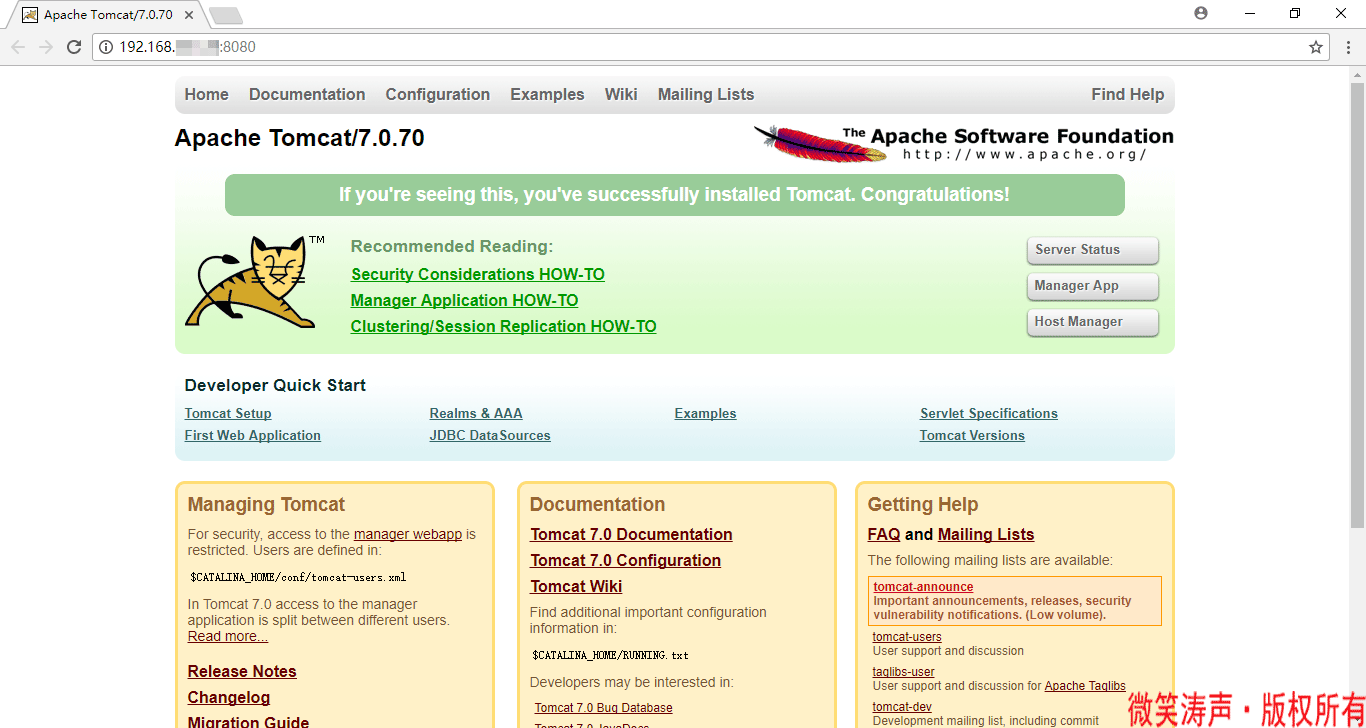
You now have a basic Django project and a development server running. To view your running development server, visit 127.0.0.1:8000 in a browser. It will display the Django startup page:
现在,您有一个基本的Django项目和一个运行中的开发服务器。 要查看正在运行的开发服务器,请在浏览器中访问127.0.0.1:8000 。 它将显示Django启动页面:
Next you’ll create a Django app and configure your project to run a view from that app so you’ll see something more interesting than the default page.
接下来,您将创建一个Django应用,并配置您的项目以从该应用运行视图,这样您会看到比默认页面更有趣的内容。
第2步-制作基本的Django应用 (Step 2 — Making a Basic Django App)
In this step, you’ll create the skeleton of the app that will hold your Droplet results. You’ll come back to this app later once you’ve set up the API call to populate it with data.
在此步骤中,您将创建用于保存Droplet结果的应用程序框架。 设置API调用以向其填充数据后,您将稍后返回此应用。
Make sure you’re in the do_django_project directory, and create a Django app using the following command:
确保您位于do_django_project目录中,并使用以下命令创建Django应用程序:
- python3 manage.py startapp display_droplets python3 manage.py startapp display_droplets
Now you need to add the new app to INSTALLED_APPS in the settings.py file, so Django will recognize it. settings.py is a Django configuration file that’s located inside another subdirectory in the Django project and has the same name as the project folder (do_django_project). Django created both folders for you. Switch to the do_django_project directory:
现在,您需要将新应用添加到settings.py文件中的INSTALLED_APPS中,以便Django识别出来。 settings.py是一个Django配置文件,位于Django项目的另一个子目录中,并且与项目文件夹( do_django_project )具有相同的名称。 Django为您创建了两个文件夹。 切换到do_django_project目录:
- cd do_django_project cd do_django_project
Edit settings.py in the editor of your choice:
在您选择的编辑器中编辑settings.py :
- nano settings.py 纳米settings.py
Add your new app to the INSTALLED_APPS section of the file:
将新应用添加到文件的INSTALLED_APPS部分:
INSTALLED_APPS = [
    'django.contrib.admin',
    'django.contrib.auth',
    'django.contrib.contenttypes',
    'django.contrib.sessions',
    'django.contrib.messages',
    'django.contrib.staticfiles',
    # The new app
    'display_droplets',
]
Save and close the file when you’re done.
完成后,保存并关闭文件。
GetDroplets视图功能 (GetDroplets View Function)
Next you’ll create a function, GetDroplets, inside the display_droplets app’s views.py file. This function will render the template you’ll use to display Droplet data, as context, from the API. context is a dictionary that is used to take data from Python code and send it to an HTML template so it can be displayed in a web page.
接下来,您将在display_droplets应用的views.py文件中创建一个GetDroplets函数。 此函数将从API渲染您将用于显示Droplet数据作为context的模板。 context是一个字典,用于从Python代码获取数据并将其发送到HTML模板,以便可以将其显示在网页中。
Switch to the display_droplets directory:
切换到display_droplets目录:
- cd .. 光盘..
- cd display_droplets cd display_droplets
Open views.py for editing:
打开views.py进行编辑:
- nano views.py 纳米views.py
Add the following code to the file:
将以下代码添加到文件中:
from django.views.generic import TemplateView

class GetDroplets(TemplateView):
    template_name = 'droplets.html'
    def get_context_data(self, *args, **kwargs):
        pass
Save and close the file.
保存并关闭文件。
Later you will populate this function and create the droplets.html file, but first let’s configure urls.py to call this function when you visit the development server root directory (127.0.0.1:8000).
稍后,您将填充此函数并创建droplets.html文件,但是首先让我们将urls.py配置为在访问开发服务器根目录( 127.0.0.1:8000 )时调用此函数。
Switch back to the do_django_project directory:
切换回do_django_project目录:
- cd .. 光盘..
- cd do_django_project cd do_django_project
Open urls.py for editing:
打开urls.py进行编辑:
- nano urls.py 纳米urls.py
Add an import statement for GetDroplets, then add an additional path to urlpatterns that will point to the new view.
添加import语句GetDroplets ,然后添加一个额外的路径urlpatterns将指向新的看法。
from django.contrib import admin
from django.urls import path
from display_droplets.views import GetDroplets

urlpatterns = [
    path('admin/', admin.site.urls),
    path('', GetDroplets.as_view(template_name='droplets.html'), name='Droplet View'),
]
If you want to make your own custom paths, the first parameter is the URL (such as example.com/**admin**), the second parameter is the function to call to produce the web page, and the third is just a name for the path.
如果要创建自己的自定义路径,则第一个参数是URL(例如example.com/**admin** ),第二个参数是用于调用以生成网页的函数,第三个参数只是一个路径的名称。
Save and close the file.
保存并关闭文件。
液滴模板 (Droplets Template)
Next you’ll be working with templates. Templates are HTML files that Django uses to create web pages. In this case, you’ll use a template to construct an HTML page that displays the API data.
接下来,您将使用模板 。 模板是Django用于创建网页HTML文件。 在这种情况下,您将使用模板来构建显示API数据HTML页面。
Switch back to the display_droplets directory:
切换回display_droplets目录:
- cd .. 光盘..
- cd display_droplets cd display_droplets
Inside this directory, create a template folder and switch to that directory:
在此目录中,创建一个template文件夹并切换到该目录:
- mkdir templates mkdir模板
- cd templates cd模板
Create droplets.html and open it for editing:
创建droplets.html并将其打开以进行编辑:
- nano droplets.html 纳米droplets.html
To avoid having to write any sort of CSS for this project, we’ll use Bulma CSS because it’s a free and lightweight CSS framework that allows you to create clean-looking web pages just by adding a few class attributes to the HTML.
为避免为该项目编写任何类型CSS,我们将使用Bulma CSS,因为它是一个免费的轻量级CSS框架,允许您通过向HTML添加一些类属性来创建外观简洁的网页。
Now let’s create a template with a basic navigation bar. Add the following code to the droplets.html file.
现在,让我们创建一个带有基本导航栏的模板。 将以下代码添加到droplets.html文件。
<!DOCTYPE html>
<html lang="en">
<head>
    <meta charset="UTF-8">
    <title>DigitalOcean Droplets</title>
    <link crossorigin="anonymous"
          href="https://cdnjs.cloudflare.com/ajax/libs/bulma/0.7.4/css/bulma.min.css"
          integrity="sha256-8B1OaG0zT7uYA572S2xOxWACq9NXYPQ+U5kHPV1bJN4="
          rel="stylesheet"/>
    <link rel="shortcut icon" type="image/png" href="https://assets.digitalocean.com/logos/favicon.png"/>
</head>
<body>
<nav aria-label="main navigation" class="navbar is-light" role="navigation">
    <div class="navbar-brand">
        <div class="navbar-item">
            <img atl="DigitalOcean" src="https://assets.digitalocean.com/logos/DO_Logo_icon_blue.png"
                 style="margin-right: 0.5em;">Droplets
        </div>
    </div>
</nav>
</body>
</html>
Save and close the file.
保存并关闭文件。
This code imports Bulma into boilerplate HTML and creates a nav bar displaying “Droplets.”
此代码将Bulma导入样板HTML,并创建显示“ Droplets”的nav栏。
Refresh your browser tab to view the changes you made to the template.
刷新浏览器选项卡以查看对模板所做的更改。
So far you haven’t touched anything related to APIs; you’ve created a foundation for the project. Next you’ll put this page to good use by making an API call and presenting the Droplet data.
到目前为止,您还没有涉及任何与API相关的内容; 您已经为该项目创建了基础。 接下来,您将通过调用API并显示Droplet数据来充分利用此页面。
第3步-进行API调用 (Step 3 — Making The API Call)
In this step, you’ll set up an API call and send the Droplet data as context to the template to display in a table.
在此步骤中,您将设置API调用,并将Droplet数据作为上下文发送到模板以显示在表中。
获取液滴数据 (Getting Droplet Data)
Navigate back to the display_droplets app directory:
浏览回到display_droplets应用程序目录:
- cd .. 光盘..
Install the requests library so you can talk to the API:
安装requests库,以便您可以与API对话:
- pip install requests 点安装请求
The requests library enables your code to request data from APIs and add headers (additional data sent along with our request).
使用requests库,您的代码可以从API请求数据并添加标头(与我们的请求一起发送的其他数据)。
Next, you’ll create a services.py file, which is where you’ll make the API call. This function will use requests to talk to https://api.digitalocean.com/v2/droplets and append each Droplet in the JSON file returned to a list.
接下来,您将创建一个services.py文件,在该文件中将进行API调用。 此函数将使用requests与https://api.digitalocean.com/v2/droplets进行对话,并将每个Droplet附加到返回列表的JSON文件中。
Open services.py for editing:
打开services.py进行编辑:
- nano services.py 纳米服务
Add the following code to the file:
将以下代码添加到文件中:
import os
import requests

def get_droplets():
    url = 'https://api.digitalocean.com/v2/droplets'
    r = requests.get(url, headers={'Authorization':'Bearer %s' % 'access_token'})
    droplets = r.json()
    droplet_list = []
    for i in range(len(droplets['droplets'])):
        droplet_list.append(droplets['droplets'][i])
    return droplet_list
Inside the get_droplets function, two things occur: a request is made and data is parsed. url contains the URL requesting Droplet data from the DigitalOcean API. r stores the requested data.
在get_droplets函数内部,发生两件事:发出请求并解析数据。 url包含从DigitalOcean API请求Droplet数据的URL。 r存储请求的数据。
requests takes two parameters in this case: url and headers. If you want data from a different API, you’d replace the url value with the appropriate URL. headers sends DigitalOcean your access token, so they know you’re allowed to make the request and for what account the request is being made.
在这种情况下, requests接受两个参数: url和headers 。 如果要从其他API获得数据,则可以使用适当的URL替换url值。 headers向DigitalOcean发送您的访问令牌,因此它们知道您被允许提出请求以及提出请求的帐户。
droplets contains the information from the r variable, but now it has been converted from JSON, the format the API sends information in, into a dictionary which is easy to use in a for loop.
droplets包含来自r变量的信息,但现在它已从JSON (API以其发送信息的格式)转换为字典,该字典易于在for循环中使用。
The next three lines create an array, droplet_list[]. Then a for loop iterates over the information in droplets, and adds each item to the list. All of the information taken from the API and stored in droplets can be found in DigitalOcean’s Developer Docs.
接下来的三行创建一个数组droplet_list[] 。 然后一个for循环遍历droplets的信息,并将每个项目添加到列表中。 从API获取并存储在droplets所有信息都可以在DigitalOcean的Developer Docs中找到 。
Note: Don’t forget to replace access_token with your access token. Also, keep it safe and never publish that token online.
注意:不要忘记用您的访问令牌替换access_token 。 此外,请保持安全,切勿在线发布该令牌。
Save and close the file.
保存并关闭文件。
保护您的访问令牌 (Protecting Your Access Token)
You should always hide your access token, but if someone ever wanted to run your project, you should have an easy way for them to add their own access token without having to edit Python code. DotENV is the solution as variables are kept in a .env file that can be conveniently edited.
您应该始终隐藏访问令牌,但是如果有人想运行您的项目,则应该为他们提供一种简单的方法,使他们无需编辑Python代码即可添加自己的访问令牌。 DotENV是解决方案,因为变量保存在.env文件中,可以方便地进行编辑。
Navigate back to the do_django_project directory:
浏览回到do_django_project目录:
- cd .. 光盘..
To start working with environment variables, install python-dotenv:
要开始使用环境变量,请安装python-dotenv :
- pip install python-dotenv 点安装python-dotenv
Once it’s installed, you need to configure Django to handle environment variables, so you can reference them in code. To do that, you need to add a few lines of code to manage.py and wsgi.py.
安装完成后,您需要配置Django以处理环境变量,因此可以在代码中引用它们。 为此,您需要添加几行代码到manage.py和wsgi.py
Open manage.py for editing:
打开manage.py进行编辑:
- nano manage.py 纳米管理
Add the following code:
添加以下代码:
"""Django's command-line utility for administrative tasks."""
import os
import sys
import dotenv

def main():
    os.environ.setdefault('DJANGO_SETTINGS_MODULE', 'do_django_project.settings')
    try:
        from django.core.management import execute_from_command_line
    except ImportError as exc:
        raise ImportError(
            "Couldn't import Django. Are you sure it's installed and "
            "available on your PYTHONPATH environment variable? Did you "
            "forget to activate a virtual environment?"
        ) from exc
    execute_from_command_line(sys.argv)

if __name__ == '__main__':
    main()

dotenv.load_dotenv(
    os.path.join(os.path.dirname(__file__), '.env')
)
Adding this in manage.py means that when you issue commands to Django in development it will handle environment variables from your .env file.
在manage.py添加它意味着在开发中向Django发出命令时,它将处理.env文件中的环境变量。
Save and close the file.
保存并关闭文件。
If you ever need to handle environment variables in your production projects, you can do that from the wsgi.py file. Change to the do_django_project directory:
如果您需要在生产项目中处理环境变量,则可以从wsgi.py文件中执行。 转到do_django_project目录:
- cd do_django_project cd do_django_project
And open wsgi.py for editing:
并打开wsgi.py进行编辑:
- nano wsgi.py 纳米wsgi.py
Add the following code to wsgi.py:
将以下代码添加到wsgi.py :
import os
import dotenv

from django.core.wsgi import get_wsgi_application

os.environ.setdefault('DJANGO_SETTINGS_MODULE', 'do_django_project.settings')

dotenv.load_dotenv(
    os.path.join(os.path.dirname(os.path.dirname(__file__)), '.env')
)

application = get_wsgi_application()
This code snippet has an additional os.path.dirname() because wsgi.py needs to look two directories back to find the .env file. This snippet is not the same as the one used for manage.py.
此代码段具有附加的os.path.dirname()因为wsgi.py需要wsgi.py两个目录才能找到.env文件。 此代码段与用于manage.py代码段不同。
Save and close the file.
保存并关闭文件。
Now you can use an environment variable in services.py instead of your access token. Switch back to the display_droplets directory:
现在,您可以在services.py使用环境变量代替访问令牌。 切换回display_droplets目录:
- cd .. 光盘..
- cd display_droplets cd display_droplets
Open services.py for editing:
打开services.py进行编辑:
- nano services.py 纳米服务
Now replace your access token with an environment variable:
现在,将访问令牌替换为环境变量:
import os
import requests

def get_droplets():
    url = "https://api.digitalocean.com/v2/droplets"
    r = requests.get(url, headers={'Authorization':'Bearer %s' % os.getenv('DO_ACCESS_TOKEN')})
    droplets = r.json()
    droplet_list = []
    for i in range(len(droplets['droplets'])):
        droplet_list.append(droplets['droplets'][i])
    return droplet_list
Save and close the file.
保存并关闭文件。
The next step is to create a .env file. Switch back to the do_django_project directory:
下一步是创建一个.env文件。 切换回do_django_project目录:
- cd .. 光盘..
Create a .env file and pen the file for editing:
创建一个.env文件,然后将其保存以进行编辑:
- nano .env 纳米.env
In .env, add your token as the variable DO_ACCESS_TOKEN:
在.env ,将令牌添加为变量DO_ACCESS_TOKEN :
DO_ACCESS_TOKEN=access_tokenSave and close the file.
保存并关闭文件。
Note: Add .env to your .gitignore file so it is never included in your commits.
注意:将.env添加到您的.gitignore文件中,因此它永远不会包含在提交中。
The API connection is now set up and configured, and you’ve protected your access token as well. It’s time to present the information you retrieved to the user.
现在已建立并配置了API连接,并且您还保护了访问令牌。 现在该向用户展示您检索到的信息了。
步骤4 —处理视图和模板中的液滴数据 (Step 4 — Handling Droplet Data in Views and Templates)
Now that you can make API calls, you need to send the Droplet data to the template for rendering. Let’s return to the stub of the function, GetDroplets you created earlier in views.py. In the function you’ll send droplet_list as context to the droplets.html template.
现在可以进行API调用了,您需要将Droplet数据发送到模板进行渲染。 让我们回到前面在views.py创建的GetDroplets函数的存根。 在功能方面,你会送droplet_list为背景的droplets.html模板。
Switch to the display_droplets directory:
切换到display_droplets目录:
- cd display_droplets cd display_droplets
Open views.py for editing:
打开views.py进行编辑:
- nano views.py 纳米views.py
Add the following code to views.py:
将以下代码添加到views.py :
from django.shortcuts import render
from django.views.generic import TemplateView
from .services import get_droplets

class GetDroplets(TemplateView):
    template_name = 'droplets.html'
    def get_context_data(self, *args, **kwargs):
        context = {
            'droplets' : get_droplets(),
        }
        return context
Information sent to the droplets.html template is handled via the context dictionary. This is why droplets acts as a key and the array returned from get_droplets() acts as a value.
发送到droplets.html模板的信息通过context字典进行处理。 这就是为什么droplets充当键,而从get_droplets()返回的数组充当值的原因。
Save and close the file.
保存并关闭文件。
在模板中显示数据 (Presenting the Data in the Template)
Inside the droplets.html template you’ll create a table and populate it with the droplet data.
在droplets.html模板内,您将创建一个表,并使用droplets.html数据填充该表。
Switch to the templates directory:
切换到templates目录:
- cd templates cd模板
Open droplets.html for editing:
打开droplets.html进行编辑:
- nano droplets.html 纳米droplets.html
Add the following code after the nav element in droplets.html:
添加以下代码后nav在元素droplets.html :
<table class="table is-fullwidth is-striped is-bordered">
    <thead>
    <tr>
        <th>Name</th>
        <th>IPv4 Address(es)</th>
        <th>Id</th>
        <th>Region</th>
        <th>Memory</th>
        <th>CPUs</th>
        <th>Disk Size</th>
    </tr>
    </thead>
    <tbody>
    {% for droplet in droplets %}
    <tr>
        <th>{{ droplet.name }}</th>
        {% for ip in droplet.networks.v4 %}
        <td>{{ ip.ip_address }}</td>
        {% endfor %}
        <td>{{ droplet.id }}</td>
        <td>{{ droplet.region.name }}</td>
        <td>{{ droplet.memory }}</td>
        <td>{{ droplet.vcpus }}</td>
        <td>{{ droplet.disk }}</td>
    </tr>
    {% endfor %}
    </tbody>
</table>
{% for droplet in droplets %} ... {% endfor %} is a loop that iterates through the array of Droplets retrieved from views.py. Each Droplet is inserted in a table row. The various {{ droplet.<attribute> }} lines retrieve that attribute for each Droplet in the loop, and inserts it in a table cell.
{% for droplet in droplets %} ... {% endfor %}是一个循环,循环遍历从views.py检索的液滴数组。 每个Droplet都插入到表格行中。 各种{{ droplet.<attribute> }} Droplet {{ droplet.<attribute> }}行针对循环中的每个Droplet检索该属性,并将其插入表格单元格中。
Save and close the file.
保存并关闭文件。
Refresh your browser and you will see a list of Droplets.
刷新浏览器,您将看到Droplet列表。
You can now handle the DigitalOcean API inside your Django projects. You’ve taken the data retrieved from the API and plugged it into the template you created earlier, to display the information in a readable and flexible manner.
现在,您可以在Django项目中处理DigitalOcean API。 您已经获取了从API检索到的数据,并将其插入到您先前创建的模板中,以可读且灵活的方式显示信息。
结论 (Conclusion)
In this article you built a Django project that can display Droplet information from the DigitalOcean API with Bulma CSS styling. You’ve learned three important skills by following this tutorial:
在本文中,您构建了一个Django项目,该项目可以显示具有Bulma CSS样式的DigitalOcean API中的Droplet信息。 通过学习本教程,您已经学习了三个重要技能:
How to handle API requests in Python using the
requestsandjsonmodules.如何使用
requests和json模块在Python中处理API请求。How to display API data in a Django project using
viewandtemplatelogic.如何使用
view和template逻辑在Django项目中显示API数据。How to safely handle your API tokens using
dotenvin Django.如何在Django中使用
dotenv安全地处理API令牌。
Now that you’ve gotten an introduction to handling APIs in Django, you can create a project of your own using either another feature from the DigitalOcean API or another API altogether. You can also check out other Django tutorials or a similar tutorial with the React framework.
现在,您已经了解了如何在Django中处理API,现在可以使用DigitalOcean API的另一个功能或完全使用另一个API来创建自己的项目。 您还可以查看其他Django教程或带有React框架的类似教程 。
翻译自: https://www.digitalocean.com/community/tutorials/how-to-display-data-from-the-digitalocean-api-with-django

![[SIP]可用于Team内部讲解并演示SIP协议的2个幻灯片](/images/no-images.jpg)